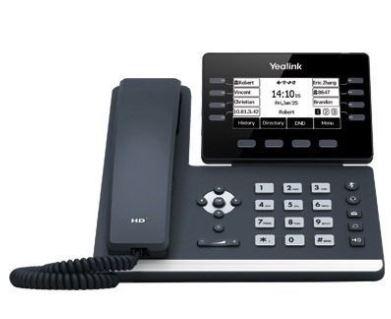
As with any phone system, knowing how to use it is essential so that you can get the most out of it. If you’re one of our CloudWorx customers, you’ll likely be using a Yealink phone for your business needs. To get you started, we’ve created this Yealink basic user guide to help you navigate the basic functions of your business phone system. If you prefer to watch a video with step-by-step instructions, please visit the bottom of this page where Carlos, our Project Specialist, walks you carefully through the Yealink basic user guide.
Yealink Basic User Guide
The instructions listed below are a guide for the features you will likely use most often. Your phone has additional features and operations. Visit our Yealink phone manuals page for more detailed instructions on your phone model.
Making A Phone call
You can dial your Yealink phone on-hook or off-hook and there is no need to dial a 9 to dial out. In fact, if your phone shares the same area code as the number you’re calling you don’t have to dial the area code either.
- Pick up the phone or press the speaker button
- Dial the phone number
- Press send (or the # symbol)
Intercom and Extension Dialing
There are two ways that you can dial an internal extension.
Dialing an Extension
- Pick up the phone or press the speaker button
- Dial the extension
- Press send (or # symbol)
This will ring the extensions desk before they pick up.
Intercom Feature
- Press the Intercom button on your phone smart button before dialing the number
- Dial the extension
- Press Send
This feature acts as a voice announcement, like what you would hear in an overhead announcement. You simply start talking. If you use this feature, the phone at the extension you are dialing will NOT ring.
Making A conference Call
When you’re on a phone call (either you received the call or you made it), you will see “Conference” appear as a smart button on your phone.
- Press the Conference button to put the caller into a holding pattern. Do not place them on hold or on park.
- Dial another number or an extension
- Press the Conference button again to get everyone talking in the call. The phone will tell you how many people are in the conference.
Caller ID Control
This feature allows you to make a call without the receiver knowing the name or number of the business. Your number will appear as “unknown.” You can even do this with your personal phone, as the process is the same.
- Dial *67
- Dial the phone number
- Press Send
Receiving Calls
Pick up the receiver or press the speaker button. Yealink phones have caller ID capabilities so you will be able to determine whether it is an internal call or an external caller.
Putting A Call on Hold
When you’re on an outside call a Hold button will appear as a smart button. This button serves as an “exclusive hold” for you, meaning only you will be able to pick up the caller placed on that Hold button.
When we install your phone system we will install “Park” buttons, which will appear on the side of your phone. When you’re on a call and want someone else to pick up, place the call on a Park button. The button will be lit up across your organization so anyone can take the call.
Setting Up Voicemail
The first time you log into your mailbox a recording will walk you through the steps for setting it up.
- Press the Envelope button on your phone
- You will be prompted to enter your pin
- Option number 5 allows you to record your name and change your password
- Option number 6 allows you to record your greeting
If your option are different than what is listed above, please listen to the prompts as they walk you through the steps.
Accessing Voicemail
The light on your phone will be red and the phone screen will tell you how many message you have.
- Press the Envelope button
- You will be prompted for your password
- Follow the prompts to retrieve your messages
If you’re not at your desk, but want to check your voicemail you can go to any phone in the network:
- Dial 5000
- The system will prompt you to enter your extension number.
Transferring Calls
Transferring to Another Station
- Select Transfer on your smart key
- Dial the extension number
- Press Send
- Hang up
This will transfer the call to a colleague.
Transferring to Voicemail
If your colleague is out of work or stepped away from their desk, you can transfer a phone all directly to their voicemail without having the call ring their desk first.
- Press the Transfer button
- Press *1
- Dial the extension number
- Press Send
- Hang up
Program Speed Dials
- Without lifting the receiver, Press the Directory button
- Select Local Directory
- Select All Contacts
- Select Add
- Put in the name of the contact
- Use the down arrow to enter the phone number of the contact
- Press Save
Accessing Your Speed Dials
- Press Directory
- Find Local Directory, and press Enter
- Find All Contacts, and press Enter
- Use the down arrow to select the contact you want to call
- Hit Send
This Yealink basic user guide provides you with the functions of the features you will likely use the most. If you have additional questions about your phone operation, please contact our support team for more guidance.


